- brown thread
- dried red roses
- shallot husks
- garlic bulb bottom
- two garlic clove husks
- cloves
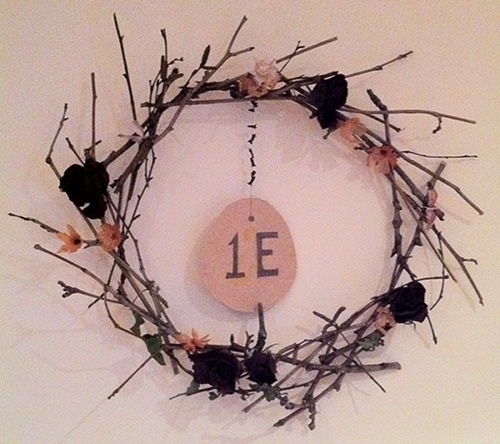
- chipboard with sigils (This girl added her apt. number.)
- ivy vine segment
- birch twiglets with catkins
- 30-some London plane tree twigs
To make the wreath itself, separate my twigs out into long & girthy (5), mid-length & middling thickness (two groups of 5 or 6), and the shortest & thinnest (five groups of 3 or 4).
The longest, thickest twigs were bound to each other in a rough pentagon base using the brown thread. The first group of middling twigs then got bound at either end to the midsections of two base twigs. Second group of middling ones got bound to the previous group in the same way, building on the layers and rounding out the wreath. At this point you can just resorted to weaving the smaller twiglets through the gaps in a clockwise whorl, accenting the wreath’s outer edge, and applying glue with a cheap brush at the points of contact as needed. You can also also used the PVA glue to coat & reinforce the thread bindings.
Before you start applying the smaller decorative elements, it’s a good idea to first determine which end of your wreath will be “up” when upright and flat against a door or wall. This is also crucial if you wish to suspend a central element, like chipboard sigils / door numbers. During the construction it will gradually become apparent which curvy or branched twig will serve best to hook over a nail or other support so that the wreath hangs well.
This is a fantastic way to signal “hark! a witch lives here” without being glaringly obvious, so those of you in the broom closet can stake a claim to your space in a sneakily blatant way!
(Taken from this post on tumblr)
No comments:
Post a Comment